
Creative Cutters: String Art – Using the Rhinestone Tool in Silhouette Studio
This site includes affiliate links. If you purchase from these links you will not pay more for the product, but I may earn a small commission which helps defray the costs of keeping the site running. I am also a participant in the Amazon Services LLC Associates Program, an affiliate advertising program designed to provide a means for me to earn commissions by linking to Amazon.com and affiliated sites. I appreciate your support!
As I’ve said before, it’s always a great week when the Creative Cutters group gets together! I was very eager to see everyone again after the Christmas break and having postponed our first meeting of 2018 due to snow (in Texas!!!). A few “regulars” were absent due to either illness or work commitments, but we welcomed one new member and a welcomed back a few others we hadn’t seen in a while.
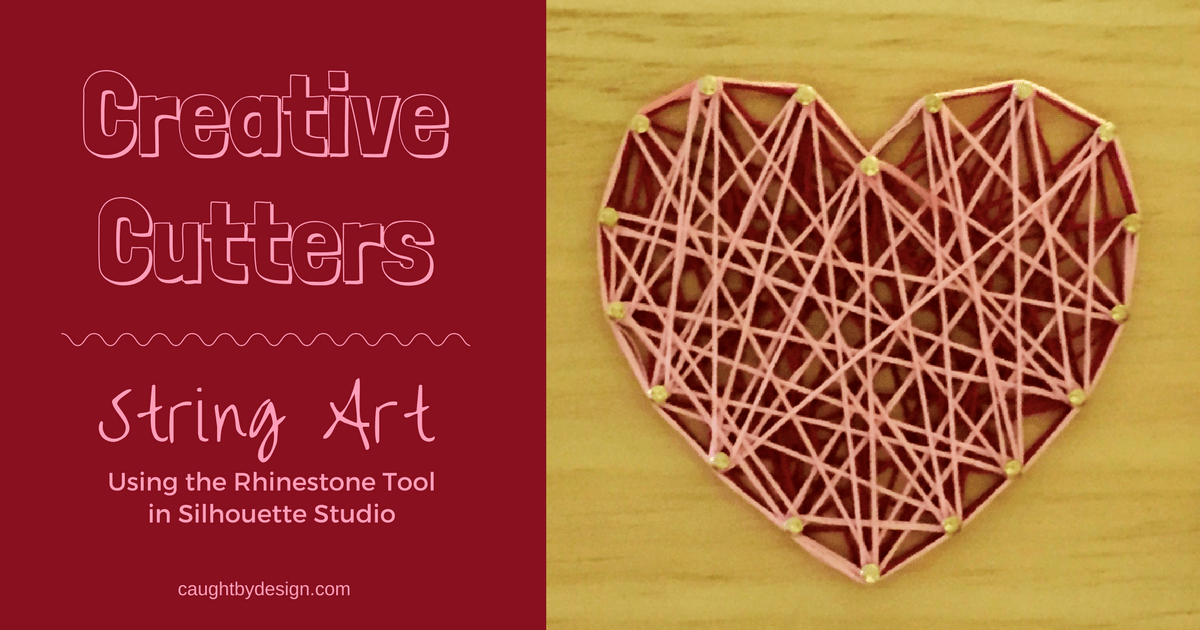
Our project for the evening was a string art heart and utilized a feature of Silhouette Studio that may surprise you – the rhinestone tool!
 Previously, we used the rhinestone tool (available in Designer Edition and above) to add sparkle to a bag for our Silhouette tools, but in this class I demonstrated how to use it to make a string art template. (Designer Edition can be purchased here.)

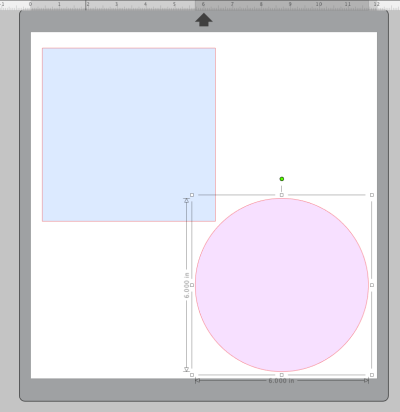
To begin, I drew a shape to match the dimensions of the wood block (either a square or a circle).
Note: All screenshots are from Silhouette Studio Version 4.1
A clip art graphic, imported into Studio and traced in the software, provided the heart outline. This outline was then easily converted to a stencil using the rhinestone tool.


Adjusting the spacing and the stone size resulted in a perfect template to use for nail placement.

Each hole was evenly spaced and matched the design precisely.

To use the template, each person simply placed it on top of their wood block, marked the holes with a pencil, and then hammered a nail into each mark.


Wrapping embroidery floss around the nails in a unique color combination and pattern completed the design.

My favorite part is always the happy faces at the end of the evening!

As you can see, the rhinestone tool has more uses than just adding sparkle to your garments and accessories. What are some ways you can think of to use this tool? Share them in the comments below or over on my Facebook page.
And if you’re in the East Texas area and want to spend a fun night crafting and learning more about all the Silhouette machines can do, why don’t you join us for Creative Cutters? Our next meeting is February 20, 2018 at 6:30 pm and you can find out more details here. We’d love to have you!
Until next time,

This post may contain affiliate advertising. This means that if you click on a link in the post, I may make a commission based on your purchase. The price you pay for the product or service is not higher, and the commissions I earn help keep Caught by Design online. Thanks for your support!

Lycia is a lifelong crafter whose goal is to help others find value, confidence, and joy in whatever they create. She geeks out on using technology to supercharge craft projects with Silhouette Studio, Design Space, Glowforge, sublimation, etc.! Lycia teaches these skills and more through online tutorials and videos as well as in-person classes at both the local and national levels.
Such a fun evening and project! Thank you so much Lycia!!!!
You’re welcome. I really have as much fun as everybody else! And you know I couldn’t do it without my great helpers 🙂 .