
Creative Cutters: Bless You Jars (with tutorial!)
includes a free download for dust cover cut file
This site includes affiliate links. If you purchase from these links you will not pay more for the product, but I may earn a small commission which helps defray the costs of keeping the site running. I am also a participant in the Amazon Services LLC Associates Program, an affiliate advertising program designed to provide a means for me to earn commissions by linking to Amazon.com and affiliated sites. I appreciate your support!
Is it possible that each Creative Cutters meeting is better than the last? It sure feels that way to me! We had a wonderful turnout this week and over half of the attendees were brand-new to our group. I love, love, love seeing new faces – especially when I can introduce a few of them to the wonders of the Silhouette machines!
Our project for this month was “Bless You Jars” – Mason jars that are painted and decorated and turned into tissue dispensers. There is no one “right way” to create one of these, but I’ll share with you how we made ours.

Creating the Bless You Jar
Note: This project was designed to be completed in a 2-2.5 hour period. If I were creating this project at home, I would allow more time between paint coats in order to be sure each coat is thoroughly dry. You could also use glass paint (which requires oven-curing) or spray paint. There is lots of room for interpretation so let your creativity run wild!

Supplies needed:
(Click on the green product links for more information.)
- Mason jar & ring (wide-mouth, quart size)
- Rubbing alcohol (70% or greater concentration)
- Paper towels
- Paint
- Foam paintbrush or makeup sponge
- Decal
- Transfer tape
- Fabric dust cover (instructions below)
- Adhesive (E6000)
- Embellishments: flowers, twine, jute, etc
- Glue gun & glue sticks
- Tissues (see note)
- Optional: sandpaper, spray sealer
- Other: heat gun, baby wipes, small disposable plate to hold paint, weeding tool, squeegee
Here are the steps we followed:
- Clean the outside of the jar with alcohol and a paper towel.
- Apply the first coat of paint. We used Waverly Chalk Paint and applied it using a makeup sponge. The trick is to use VERY thin coats and not overwork the paint. A few people applied their paint too thick and it pulled off when the transfer tape was removed in Step 8. You can also paint the jar ring, if desired.


- Allow paint to dry thoroughly! Use a heat gun to set the paint if needed.

- While the paint is drying, weed the decal and apply transfer tape. Set aside. (The Creative Cutters group had three options to choose from. Two of them were the words “Bless You” typed out in either the Grand Hotel or the King Basil font. The third option was a modified version of the Mason Jar Bless You design by Lori Whitlock (Design ID #210800), available in the Silhouette Design Store. All decals were cut from Oracal 651.)


- Apply a second coat of paint and, again, allow it to dry THOROUGHLY!!! (I can’t stress this part enough!)
- While the second coat of paint is drying, create dust cover by gluing a fabric circle with “X” cutout to the inside of a jar ring, using E6000 or comparable adhesive. (See below for instructions on how to design and cut the fabric circle using your Silhouette machine.)

- Once the paint is completely dry, distress the paint with sandpaper, if desired. Be sure to wipe all dust from the surface before proceeding to Step 8.

- Use transfer tape to apply decal.


- Add embellishments as desired, using glue gun.


- Optional: apply two light coats of spray sealer.
- Add tissues* and screw on the metal ring. Pull tissues through the “X” cutout to dispense.
*Adding the tissues: The Kleenex Perfect Fit tissues work very well in the Bless You Jars but can be hard to find and rather pricey. Click here to see a video on how to use regular tissues.
Designing the Dust Cover Cut File
(All screenshots are from Silhouette Studio, version 4.1)
- Open a new design page in Silhouette Studio.
- Draw a 3.4″ circle. (To draw a perfect circle, hold down the SHIFT key while using the “Draw an Ellipse” tool. Resize to 3.4″ using the Scale Tool with the Aspect Ratio LOCKED. You can use this same technique to create a perfectly horizontal line using the “Draw a Line” tool.)

- Draw a 1.75″ line.

- With the line drawn in Step 3 selected, open the Replicate Panel and choose the 2nd tab (this is the “Number of Copies” tab). The number of copies will default to “1”. Be sure the first icon for “Position each Copy” is selected. Enter “105” in the box just under and to the right of “Rotate each Copy”. Click on “Replicate”. This will create a copy of the line, rotated by 105 degrees.

- Select both of the lines and group them together by either right-clicking and choosing “Group” or using the shortcut CTRL/CMD+G.
- Optional: Rotate the grouped lines until they look like an “X”.

- Align the X in the center-middle of the circle.

- Group the X and the circle together.
BONUS: Don’t want to create your own cut file? Download mine here!
Cutting the Fabric
In order to cut fabric on the Silhouette, the fabric must first be stabilized. Normally, I use Terial Magic, but for this project I wanted a double layer of fabric. The easiest way to achieve this was to sandwich a layer of HeatnBond UltraHold between two layers of fabric, placed with the wrong sides together.
- Cut a piece of HeatnBond UltraHold larger than the area needed to cut the dust cover(s).
- Cut a piece of fabric that is twice the size of the HeatnBond.
- Adhere the HeatnBond to the wrong side of one-half of the fabric, following the package directions.
- After removing the paper liner from the HeatNBond, fold the fabric in half with the HeatnBond sandwiched between the fabric layers and press to adhere the wrong sides together.
Place the treated fabric onto a mat that is relatively new with plenty of adhesive. Be sure that your blade is sharp. (You can use the fabric blade or any of the other Silhouette blades.) Choose your cut settings in the Send panel. I used quilting cotton to make my dust cover, so I chose “Fabric, Thin (Cotton Print)”. Depending on the thickness of your fabric, you may need to double-cut or use the “Fabric, Thick (Canvas)” setting. It is always advisable to perform a Test Cut first!
* * *
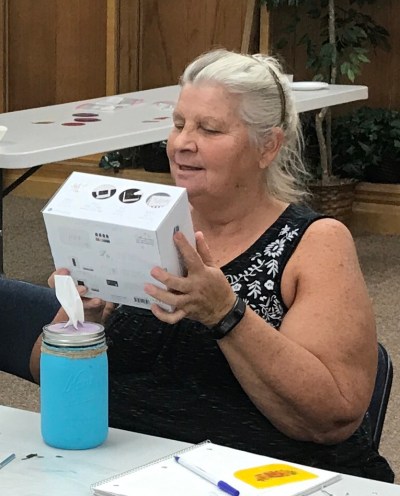
To cap off the evening, I got to give away another Mint – courtesy of Silhouette America. Congratulations Debbie! I hope you have lots of fun with your new toy tool!
This project was so much fun and, as usual, there were lots of smiling faces at the end. That’s always the best part!

I hope you’ll try creating your own Bless You Jar (I’d love to hear from you if you do!). And if you’re in the East Texas area, why not join me for our next Creative Cutters meeting on October 16 at 6:30 pm here in Carthage. You can find out more by emailing me or visiting me over on Facebook!
Until next time,

This post contains affiliate advertising. If you click on a link in the post, I may make a commission based on your purchase. The price you pay for the product or service is not higher, and the commissions I earn help keep Caught by Design online. Thanks for your support!

Lycia is a lifelong crafter whose goal is to help others find value, confidence, and joy in whatever they create. She geeks out on using technology to supercharge craft projects with Silhouette Studio, Design Space, Glowforge, sublimation, etc.! Lycia teaches these skills and more through online tutorials and videos as well as in-person classes at both the local and national levels.
Thank YOU Heather! I’m so glad you tried the project and found the tutorial to be helpful!
A few friends in Fulshear Tx had a lot of fun creating these! We live too far away to come to class but I’m sure we will make more of your creations. Thank you for the inspiration and idea!