
How to Create Detailed Sublimation Designs Without a Printer
This site includes affiliate links. If you purchase from these links you will not pay more for the product, but I may earn a small commission which helps defray the costs of keeping the site running. I am also a participant in the Amazon Services LLC Associates Program, an affiliate advertising program designed to provide a means for me to earn commissions by linking to Amazon.com and affiliated sites. I appreciate your support!
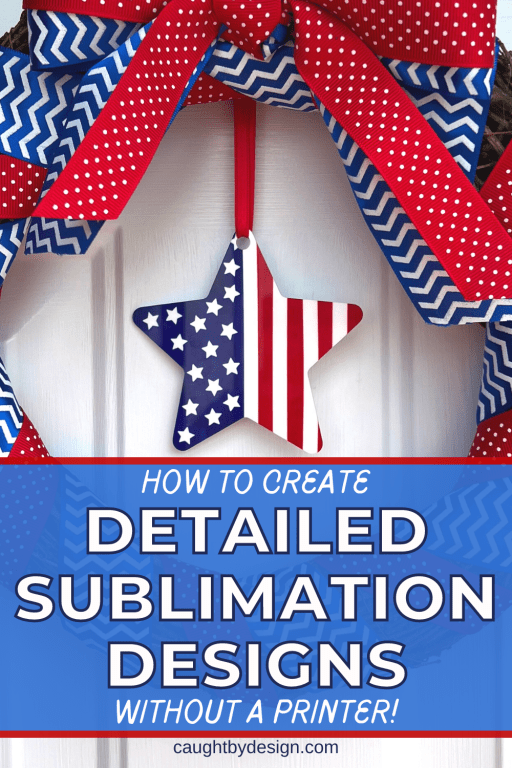
Don’t you love it when a project turns out just like you pictured it in your head – or maybe even better??? I know I do! And that’s exactly how I felt when I finished this stars and stripes ornament! What’s even better is that I was able to create the sublimation design without using a sublimation printer or sublimation paper.
Drawing or painting the detail in the flag design requires a steady hand and artistic skills I don’t have. But with the help of my Artesprix sublimation acrylic paints, a few basic supplies, and a cool masking technique, I was able to create a very detailed sublimation design with only basic painting skills. The technique can be used with sublimation markers and ink pads too. Let me show you how easy it is!

What You’ll Need
Some of the materials used in this project were provided by Artesprix in exchange for this post, but all opinions are my own.
Project Supplies
- Artesprix Sublimation Acrylic Paint (use code SUBLIMATION to save 10% on your order)
- Sublimation Blank (I used this metal star ornament)
- Heat-Resistant Tape
- Protective Paper
- Digital Cutting Machine (Silhouette, Cricut, ScanNCut, etc) and/or X-acto knife
- Pencil
- White cardstock or art paper
- Ruler or straight-edge
- Lint-free Cloth
- Squeegee
- Scissors
- Heat Press, Home Iron, or Dry Iron (Cricut EasyPress)
Painting Supplies
- Small Paintbrushes
- Styrofoam Plate or other surface to mix paint colors
- Paper Towels
- Small Cup of Water (to rinse paintbrushes)
Optional
Use code SUBLIMATION to save 10% on your order at Artesprix. Does not apply to heat presses or bundle deals.
What is Sublimation?
You may be asking yourself, what is sublimation anyway? I go into more detail in this post, but the short answer is that sublimation is the chemical process of turning a solid into a gas.
In the crafting world, sublimation refers to dye sublimation. In the dye sublimation process, special inks are used to create a design which is then heat-applied to polyester-coated materials or clothing (also referred to as “blanks”). The high temperatures used in the sublimation process cause the ink to transform into a gaseous state and infuse into the material, creating a permanent image.
Dye sublimation printers require special inks and special transfer paper. They are not the same as other types of printers, such as a standard inkjet printer or laser printer. The machinery and supplies needed can be quite an investment, especially for the crafter who only wants to create a few sublimation prints here and there.
Creating a sublimation design with sublimation paints, markers, or stamp pads is an easy, low-cost alternative to a printed design. These products allow you to create durable, permanent sublimation transfers, at an affordable price, without the need for a specialty printer or specialty paper.
Choosing a Blank
I used a metal ornament for my project, but this technique can be used on any sublimation-ready blank. Online vendors such as Artesprix, Heat Press Nation, and Conde offer a wide variety of sublimation blanks to choose from.
You could also use polyester fabrics, polyester shirts, Cricut Round Coaster Blanks (available from Amazon.com or craft stores such as Michaels) or other Cricut Infusible Ink blanks. Coasters can even be turned into ornaments by adding your own hanger like I did here.
Using the Masking Technique
To create the details in the design, we’re going to use a masking technique.
In this process, heat tape is applied to the blank to create a mask and the sublimation design is pressed on top of it. Because the tape is heat-resistant, the sublimation paint (or sublimation ink) used in the design will not transfer through. Once the masking is removed, you’ll see the original color of the blank.
The metal ornament blank I’m using has a white background, so all of the masked areas will show up as white in my finished project.
Step 1: Create the Masking Designs
The first thing we’re going to do is cut the heat tape to create the masking designs. The heat tape can be cut using an x-acto knife or a digital cutting machine. I used my Silhouette Portrait, just like I did when I made these watercolor backgrounds.

For small pieces, it’s a good idea to cut a few more than you think you’ll need. I cut 20 small stars, each about 0.3 inches x 0.3 inches.
I also cut 4 rectangles, each measuring 0.25 inches x 4 inches, to use for the white stripes.

When your machine is finished cutting, peel away the excess heat-resistant tape from around the design, just like you do when weeding vinyl.

You only want to cut through the tape, not the protective paper, but don’t panic if you accidentally cut too deep. Just peel the protective paper off of the tape before you apply the tape to the blank.
Step 2: Mix the Sublimation Acrylic Paint
Dye sublimation printing requires special inks. Artesprix sublimation acrylic paint is dye sublimation ink in paint form. It comes in 4 basic colors – blue, red, yellow, and black, along with a white lightening medium. These can be mixed together to create an infinite number of other colors.
Based on the Artesprix Color Mixing Chart, I chose Royal Blue and True Red for my design.
- Cover your workspace with a piece of freezer paper, newspaper, etc. to protect it from the paint.
- Royal Blue – Squeeze 5 small drops of blue paint onto your mixing surface. Add 2 drops of red paint. Use your paintbrush to mix well.
- True Red – Mix together 1 small drop of blue with one small drop of red to create purple. Add 2 drops of yellow to create brown. (At this point, you will have used 4 drops of paint.) Add 40 small drops of red (True Red is a 10:1 ratio of Red to Brown) and mix well.
More details on how to mix the sublimation acrylic paints can be found in this post.
Step 3: Paint
Using a pencil, trace the shape of the blank onto cardstock. (Plain paper will work with Artesprix sublimation markers, stamp inks, and paints, but I prefer to use a piece of cardstock with the paints so that nothing seeps through. Mixed media paper works well too.
Using a ruler or straight-edge, draw a pencil line down the center of the outline.

Paint the RIGHT side of the traced outline with blue paint (the transfer will be a mirror image when pressed). Overlap the center line slightly so that the blue half of the ornament is completely covered and will have a crisp edge when the mask is removed.
Paint the LEFT side of the traced outline with red paint, leaving a small gap (less than ¼ inch) between the red and blue paint. The gap is where the middle white stripe will be in the finished design.

Allow the paint to dry thoroughly. If you need to speed up the drying process, use a heat gun.
Step 4: Apply the Mask
While the paint is drying, apply the masking.
- Clean off any dust from the blank using a lint-free cloth.
- Remove the tape from the protective paper and apply to the blank just like a sticker. I started by applying one long vertical strip in the center, then used a ruler to space the other strips evenly. I finished by randomly placing the stars.

NOTE: DO NOT MIRROR THE MASKING DESIGN! What you see is what you’ll get!!!
- Burnish with your finger or a squeegee to get rid of any air bubbles and seal all edges.

Step 5: Get Ready to Press
Trim the cardstock to approximately 1 or 2 inches larger than the painted area.
Place the painted cardstock face-up on your work space. Align the blank, face-down, so that the strip of heat tape in the center is on top of the unpainted area in between the red and blue paint.
Secure the blank to the cardstock with more heat tape. Use plenty of tape so that the design does not shift.

Create a “sublimation sandwich”. Layer the sublimation blank (with the design taped to it) between two pieces of protective paper. Each piece of protective paper should be larger than the cardstock/design.
Place the sublimation sandwich so that the painted design is face-down, with the blank facing UP. When you press, the only thing that will be between the heat source and the design is one layer of protective paper.

Step 6: Press
Set your heat press to 400 degrees. Press with medium pressure for 75 seconds.
When you’re finished pressing, do a “peek test” before removing the transfer paper. Lift a corner of the cardstock and check to see that the ink has transferred and the colors are bright. If not, press for a few more seconds. (The paper will be hot so you may want to wear protective gloves!!!)
Place your ornament on a protective surface to cool. (I used my Artesprix Project Mat). Once the ornament is cool, gently remove the cardstock. Don’t worry that you can’t see anything but red and blue. The big reveal is coming!

Remove the strips of heat-tape masking to reveal the white areas of the design. You may need to use some pointed tweezers to remove the star shapes.

Look at those vibrant colors and crisp details!

Like what you see here? Share the image below to Pinterest!
Sublimation projects like this are really fun to make! I love how mine turned out and will be proudly displaying it on my front door this summer. I hope you’ll give the masking technique a try and create some of your own designs for sublimation without a printer.

When you’re done, be sure to come share the finished product with us over in the Silhouette Crafters by Design Facebook group. It’s always inspiring to see what you create!
Until next time,


Lycia is a lifelong crafter whose goal is to help others find value, confidence, and joy in whatever they create. She geeks out on using technology to supercharge craft projects with Silhouette Studio, Design Space, Glowforge, sublimation, etc.! Lycia teaches these skills and more through online tutorials and videos as well as in-person classes at both the local and national levels.