
How to make a Memorabilia Shadow Box
using your Silhouette
This site includes affiliate links. If you purchase from these links you will not pay more for the product, but I may earn a small commission which helps defray the costs of keeping the site running. I am also a participant in the Amazon Services LLC Associates Program, an affiliate advertising program designed to provide a means for me to earn commissions by linking to Amazon.com and affiliated sites. I appreciate your support!
I met my husband on a blind date. He planned a pretty safe bet for the evening, taking me to dinner and a movie. Nineteen years later, we still go on dates and still love going to movies…and plays…and concerts! And being the sweet, sentimental guy that he is, I’m pretty sure he has saved every ticket stub from every event we’ve ever attended. Most of them go in a wooden box that sits on our dresser, but after all these years that box is overflowing! I look at it every day, sometimes several times a day, and often think I need to do something better with all that memorabilia, yet I just keep putting it off – until today, that is! With the help of my Silhouette, I created a memorabilia shadow box that looks much better and provides a display we can enjoy. It’s a really quick project that can be used in a variety of ways. Let me show you how!

What You’ll Need:
- Memory shadow box frame
- Ruler or measuring tape
- Word art or other design
- Adhesive vinyl
- Rubbing alcohol
- Lint-free cloth
- Weeding tool
- Squeegee
- Transfer tape
- Scrapbook paper
- Adhesive
- Silhouette Studio
- Silhouette Cameo, Portrait, or Curio
- Printer (optional)

Step 1: Measure the frame
I’m using this great memory shadow box frame that I picked up at Hobby Lobby. It has a slot in the top of the box so we can simply drop the ticket stubs or other memorabilia right in.

The frame is 8 in x 8 in, but the part of the glass that’s visible is just over 7.25 in square.

Step 2: Set up the design
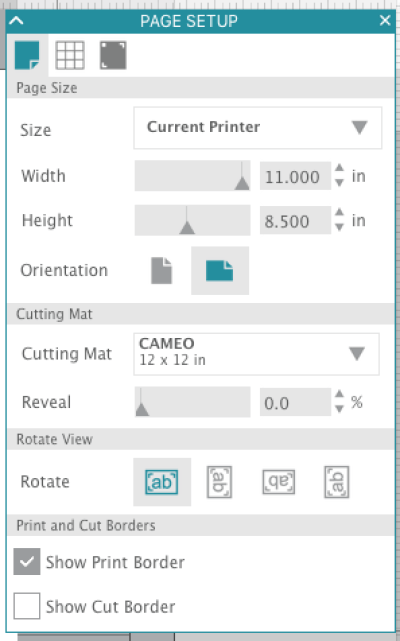
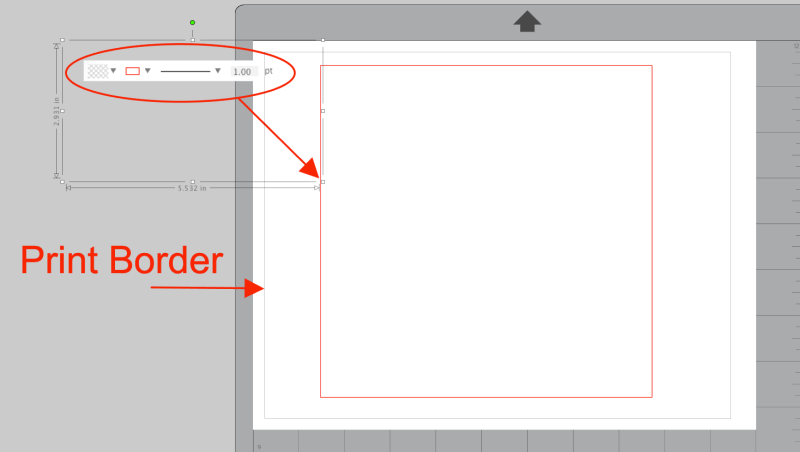
Begin by opening a new design page in Silhouette Studio. Once my design is laid out the way I (think I) want it, I’m going to print it on my printer before cutting (just to be sure I like it), so I set my page size to match the paper size I’ll be printing (8.5 in x 11 in). Either landscape or portrait orientation will work. Check the box for “Show Print Border”.
Draw a square that’s the same size as the frame measurement from Step 1. Change the line weight to 1.0pt so that the line will print out. (The default is 0.0pt, so anything larger than that will print.)
Open your design. I’m using this Stinkin Cute Paper Piecings design from the Silhouette Design Store (Design ID 95052).

Size your design to fit the frame. To do this, I ungrouped the design file and moved the individual elements around until I had the look I wanted. Once you have it arranged, group the design back together and center the design within the square.

Print out the design to preview how it will look in the frame. Adjust as necessary.


Step 3: Cut and weed the vinyl
Once your design is arranged to your liking, you’re ready to cut. I’m using Oracal 631 because I want my decal to have a matte finish to better coordinate with the frame.
Be sure to perform a Test Cut before you cut the entire design. I started with the pre-sets for “Vinyl, Matte” and increased the Force to 15. I also slowed the speed down a little since some of the text in the design is very thin. My final cut settings were:
Blade: 1 Speed: 3 Force: 15
Weed the excess vinyl.
Step 4: Apply the decal
Cut a piece of transfer tape to match the size of the square drawn in Step 2. Using a squeegee, apply the transfer tape to the decal.

Using rubbing alcohol and a lint-free cloth, remove any dust or debris from the glass.

Carefully lift the decal away from the paper backing and transfer it to the glass. Working outward from the center, smooth out any air bubbles with the squeegee.
Step 5: Finishing
Once the label is removed, you’ll see that the backing of the frame is unfinished. I cut a piece of scrapbook paper to size and adhered it using my trusty Scotch ATG gun to give it a more decorative look.

Wasn’t that easy? I love how my memory box turned out and only wish I’d done it sooner!

What kind of memorabilia are you collecting that could be displayed like this? Have you created a similar shadow box frame or maybe a different type of keepsake project? Share in the comments below and inspire others with your ideas!
Until next time,

This post may contain affiliate advertising. This means that if you click on a link in the post, I may make a commission based on your purchase. The price you pay for the product or service is not higher, and the commissions I earn help keep Caught by Design online. Thanks for your support!

Lycia is a lifelong crafter whose goal is to help others find value, confidence, and joy in whatever they create. She geeks out on using technology to supercharge craft projects with Silhouette Studio, Design Space, Glowforge, sublimation, etc.! Lycia teaches these skills and more through online tutorials and videos as well as in-person classes at both the local and national levels.