
How to make a Money Pad using your Silhouette
(plus other great ideas for giving gifts of cash!)
This site includes affiliate links. If you purchase from these links you will not pay more for the product, but I may earn a small commission which helps defray the costs of keeping the site running. I am also a participant in the Amazon Services LLC Associates Program, an affiliate advertising program designed to provide a means for me to earn commissions by linking to Amazon.com and affiliated sites. I appreciate your support!
Christmas is just around the corner! Have you finished all your holiday shopping? If you’re short on time or ideas, there’s one gift that’s perfect for any occasion – CASH! And with a little creativity, even a cash gift can look festive. Today I’ll share with you how to make a personalized money pad with help from Silhouette Studio, a PixScan mat, and your Silhouette machine. When we’re done, I’ll link you to even more ideas you can use to dress up dollar bills for gift-giving.

The Basics
What You’ll Need:
- Dollar bills in whatever denominations you choose (you’ll need at least 20 bills)
- Silhouette Chipboard
- White Cardstock
- Binder Clips
- Craft Sticks (optional)
- Padding Compound
- Glue Brush
- Silhouette Studio
- PixScan Mat (or scanner)
- Silhouette Cameo, Portrait, or Curio
Supply Notes:
- Dollar bills. New, crisp currency works best but this may not be an option for you. My bank didn’t have any fresh bills, so they gave me the best they had and I freshened them up a bit using my heat press.
- Chipboard. Alternatives include cardstock, the backing from an old notepad, or even a cereal box.
- Padding compound. Comes in white (which dries clear) as well as some colors. If you’re in a pinch and need this faster than even Amazon Prime can deliver, check with your local art supply store or print shop. Or check out this recipe I found online to make your own.
- Brush. I used a glue brush, but you could also use a small paintbrush with bristles that will allow you to “push” the padding compound into the stack of dollar bills.


Copying Currency:
Before we get started, let’s get the legalities out of the way. I’ll admit that scanning in an image of a dollar bill and printing out a copy of it can feel a bit like…well…counterfeiting! But I promise, it’s perfectly legal – as long as you follow a few, but very specific, guidelines from the US Department of the Treasury:
- The copy must be less that 75% or more than 150% the size of the original.
- Only single-sided copies are allowed.
- Any scans or digital images used to make the copy must be deleted after use.
(Just to be on the safe side, however, I’ve blurred out all serial numbers in the photos presented here.)
Now let’s make a money pad!!!
Front & Back
Step 1: Import an image of the dollar bill into Studio.
Place a dollar bill on the PixScan mat and take a photo. (If you don’t have a PixScan mat, you can scan in the image using a regular scanner but the proportions may not be as accurate.)

Import the image into Studio.


Step 2: Create the shape
Using the Draw a Rectangle tool, create a rectangle the same size as the dollar bill.

Step 3: Cut
Copy (CTRL/CMD+C) the rectangle and Paste it into a new design page. This will be the cut file for your backing.

Cut the backing from a piece of Silhouette Chipboard.


At this point, you could use the same rectangle shape to cut the front from whatever material you choose. You will also need 1-2 pieces of this size cut from scrap cardstock to use as waste pieces. (I only used one waste piece for the front. In hindsight, I wish I’d used one for the back as well.) In the next section, I’ll explain how I personalized my cover.
Personalized Cover (optional)
Step 1: Digitize an image of the dollar bill
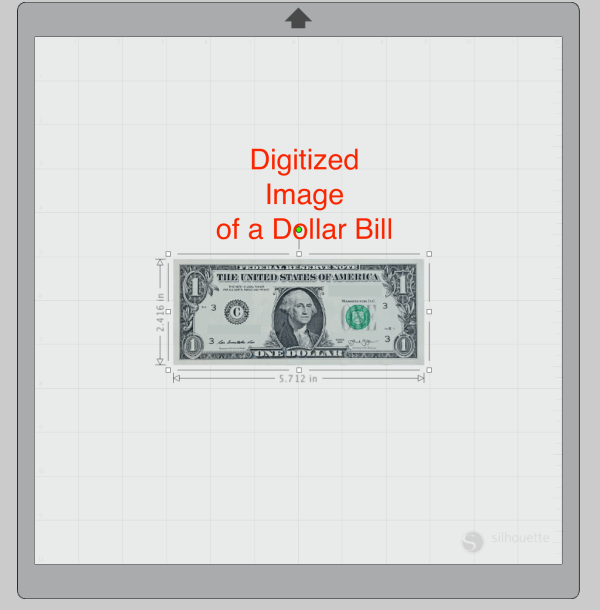
Open the photo taken on the PixScan mat as a regular JPEG (rather than a PixScan image) by choosing File>Open and navigating to where the photo is saved on your computer. (The photo will open in a new page.)

Draw a Rectangle around the dollar bill portion of the photograph. Select both the rectangle and the JPEG image and choose Object>Modify>Crop. You now have a digitized image of the dollar bill.

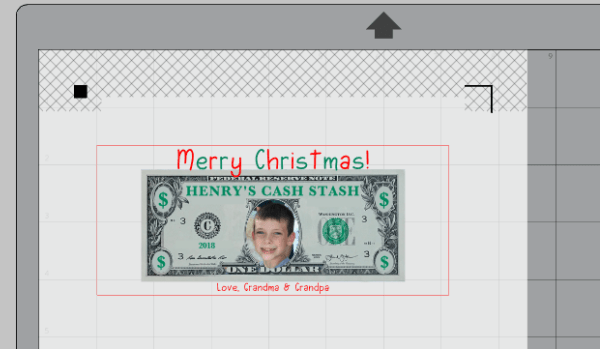
Step 2: Add photo
Choose File>Merge and import the photo you want to use. Using the Draw an Ellipse tool, create an oval the same shape as the photo on the dollar bill. Use this oval to crop out an image for the money pad cover. (Be sure to lock the aspect ratio before increasing/decreasing the oval in size.)


Select the cropped photo and move it into place over the original photo on the dollar bill.

Step 3: Add text
Using the Drawing tools, draw shapes to cover all serial numbers and any other areas where you would like to add text.

Using the eyedropper tool, fill the rectangles with a color to match the background of the dollar bill.

Type your text. I used the Baskerville font, 24pt, 115% character spacing. The text was filled with a shade of green to match the seal on the dollar bill and the line color was set to none.

Important: Be sure that all text and all shapes are set to “No Cut”.
Group everything together.
Step 4: Create a Print & Cut
Create a new design page with dimensions to match your printer (usually 8.5 in x 11 in). Add registration marks to the page by pressing M on your keyboard.
Copy the rectangle created for the front/back piece and paste it onto the new design page. Duplicate it once to create the front waste piece. If you have room on the page, duplicate it once more to create a back waste piece.

Copy and paste the personalized dollar bill onto the new design page. Scale to 75% or less (per the legal requirements). Move it into place within one of the rectangles. Add additional text as desired.
Print out the design on cardstock (I used my new Canon TS9521C) and cut on your Silhouette machine.


Putting it all together
(This is the easiest part, but also the part that takes the longest due to drying time.)
- With the waste piece on top, stack everything together and line it up as evenly as possible along the edge to be padded.


- Secure with binder clips. (I also reinforced mine with craft sticks trimmed to size.)


- Carefully apply a thin layer of padding compound, gently pressing the compound into the edge of the paper stack. Be sure that the entire edge is lightly coated. Allow to dry completely without moving the money pad. (This will usually take a few hours.)

- Apply a second coat of padding compound that is approximately 2-3 times thicker than the first coat. Allow to dry for a minimum of 6 hours or longer, preferably overnight.

- Once the padding compound is completely dry, remove the binder clip and waste piece(s). (I didn’t include a waste piece for the back, so I had to trim away the excess padding that was stuck to the craft stick.)

Your money pad is complete!
This project was so much fun and I love how it turned out. I can’t wait to give it to my grandson on Christmas morning!!!

But wait, there’s more…
Need more clever ideas on how to gift a wad of cash? Check these out:
Ornament-Shaped Gift Card Holders using designs from the Silhouette Design Store
AND HAVE A VERY, MERRY CHRISTMAS!
Until next time,

This post contains affiliate advertising. This means that if you click on a link in the post, I may make a commission based on your purchase. The price you pay for the product or service is not higher, and the commissions I earn help keep Caught by Design online. Thanks for your support!

Lycia is a lifelong crafter whose goal is to help others find value, confidence, and joy in whatever they create. She geeks out on using technology to supercharge craft projects with Silhouette Studio, Design Space, Glowforge, sublimation, etc.! Lycia teaches these skills and more through online tutorials and videos as well as in-person classes at both the local and national levels.