Creative Cutters: DIY Fall Fridge Magnets and More
This site includes affiliate links. If you purchase from these links you will not pay more for the product, but I may earn a small commission which helps defray the costs of keeping the site running. I am also a participant in the Amazon Services LLC Associates Program, an affiliate advertising program designed to provide a means for me to earn commissions by linking to Amazon.com and affiliated sites. I appreciate your support!
What better way to spend a rainy Tuesday evening than crafting with your friends? That’s exactly what we did this month at Creative Cutters! We always have a great time and this month was no exception. It may have been cold and wet outside, but inside we were warm and full of laughter as we played with fabric ink, Sparkleberry heat transfer vinyl, and vellum, creating fall-themed fridge magnets and tealight lamps with vellum lampshades.
The fall fridge magnets were made from these cute canvas art board panels that I found at my local Walmart. They are approximately 2.5 inches square. Walmart also sells the Simply Mini Magnet Panel, which is a similar product but the magnet is not quite as strong. If you can’t locate either of these, you could add a magnet to the back of a mini canvas panel.
The first step was to paint the fridge magnets using 2-3 LIGHT coats of Silhouette fabric ink. While the fabric ink was drying, we weeded the HTV decals.
We used designs from the Silhouette Design Store in a variety of fall Sparkleberry Ink patterns. (Some of the patterns have been part of the monthly Sparkleberry box subscription.)


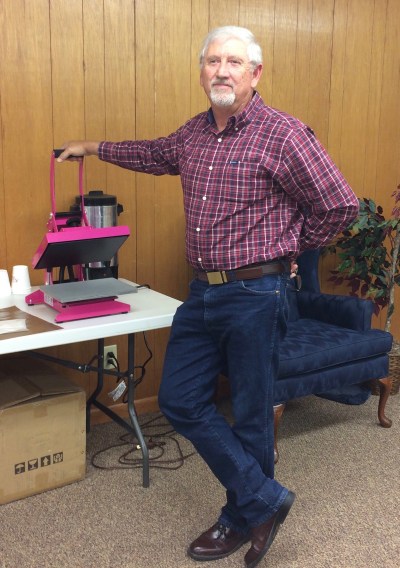
Once the fabric ink was dry to the touch (using a heat gun when necessary), we set the ink using a heat press. Mr. Caught by Design had our new pink press heated up and ready to go!
To heat-set the fabric ink:
- Fold a piece of parchment paper in half.
- Place the fridge magnet inside the folded parchment paper.
- Cover the parchment paper with a Teflon sheet. Press for 15-20 seconds at 295 degrees Farenheit. Be sure the painted side is on top, NOT the magnet! (Ask me how I know…)
Then it was time to add the decal!
When cutting patterned heat transfer vinyl, the design is NOT mirrored. Once it is cut, you will need to use a product called Magic Mask to transfer the design to whatever you’re going to press it onto. Magic Mask works similarly to the transfer tape used with adhesive vinyl and acts as the HTV carrier sheet.
- Place a piece of medium-tack Magic Mask over the weeded decal and burnish well.
- Carefully remove the decal from the backing. If any part of the decal does not peel away from the backing, stop and slowly lay the Magic Mask back onto the decal and burnish it further. Be careful not to wrinkle the decal.
- Once the decal is removed from the backer, place it onto the fridge magnet.
- Following the same pressing method as you did to set the fabric ink (with the magnet placed inside the folded parchment paper and then covered with a Teflon sheet), press for 10 seconds to tack the decal in place. Carefully remove the Magic Mask, stopping if the decal is not adhering to the painted surface (the gold ink can be especially tricky). Continue to press in additional 5-second increments until the decal is tacked into place and the Magic Mask can be completely removed.
- Place the fridge magnet inside the parchment paper once again and press for an additional 10-15 seconds to fully adhere the decal. Once again be sure the decal is on top, NOT the magnet!
Aren’t they pretty?
As a bonus project, we made these tealight lamps using wineglasses from the dollar store, an assortment of printed vellum from Hobby Lobby (you could also use solid vellum), and a tealight. The lampshade cut file is available from One Oak Designs, whose Etsy shop can be found here.

It’s safe to say a good time was had by all!
The winner of this month’s Mint (courtesy of Silhouette America) was Ms. Serita! She was so excited and I’m eager to see what she creates with it. I’m pretty sure she’ll start with some custom hanging cards for all the beautiful faux leather earrings she’s been making lately.
If you’d like to join us sometime, we’d love to have you! Our next meeting is Tuesday, November 13, at 6:30 pm in Carthage, TX. If you’d like more information, feel free to contact me or visit my Facebook page. You’re always welcome!
Until next time,
This post contains affiliate advertising. This means that if you click on a link in the post, I may make a commission based on your purchase. The price you pay for the product or service is not higher, and the commissions I earn help keep Caught by Design online. Thanks for your support!

Lycia is a lifelong crafter whose goal is to help others find value, confidence, and joy in whatever they create. She geeks out on using technology to supercharge craft projects with Silhouette Studio, Design Space, Glowforge, sublimation, etc.! Lycia teaches these skills and more through online tutorials and videos as well as in-person classes at both the local and national levels.


These were such cute projects at our meeting. So much fun !!!❤️